


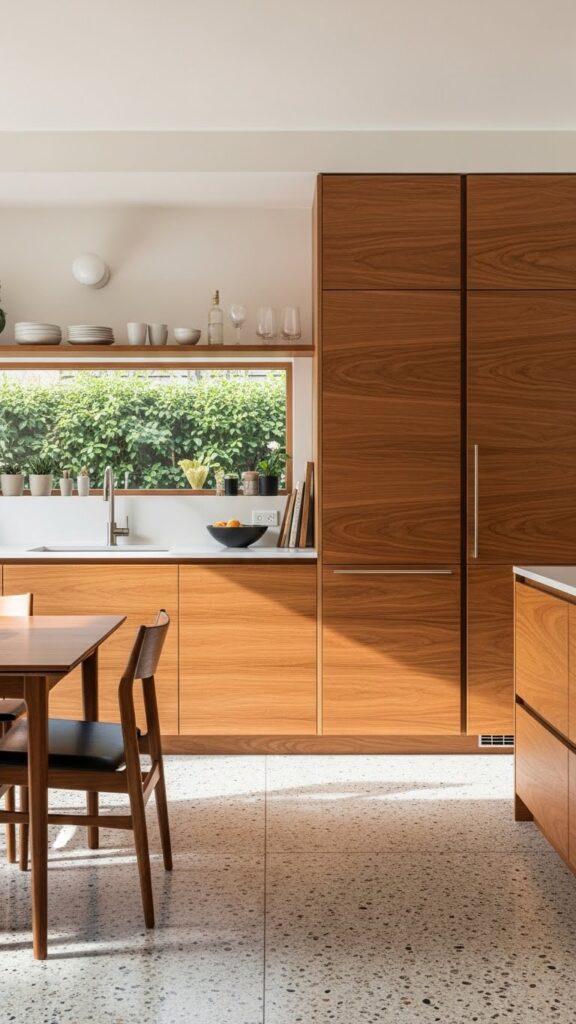
Red oak kitchen cabinets are making a powerful comeback, and for good reason. As someone with over a decade of experience in kitchen design and cabinet fabrication, I’ve seen trends come and go. The warmth and character of red oak, when handled correctly, create a timeless yet contemporary heart for your home. Forget the orange, glossy cabinets of the 90s. Today’s red oak is about sophisticated grains, modern finishes, and durable practicality. This guide will give you 16 specific design ideas and a foolproof system for choosing the perfect ones for your space.
Let’s dive into the real appeal of this classic material. You’ll learn how to specify, finish, and style red oak cabinets that will look stunning for decades. I’ll share exact product names, cost estimates from my 2024 projects, and a unique framework to simplify your entire decision process.
The Core Problem: Why Choosing Red Oak Cabinets Feels Overwhelming
Most homeowners are intrigued by red oak’s durability and value but terrified of ending up with a dated-looking kitchen. The struggle is real. You’re balancing grain pattern, finish options, door styles, and hardware—all while trying to predict how it will age. Without a clear system, it’s easy to make expensive mistakes or default to safer, blander choices.
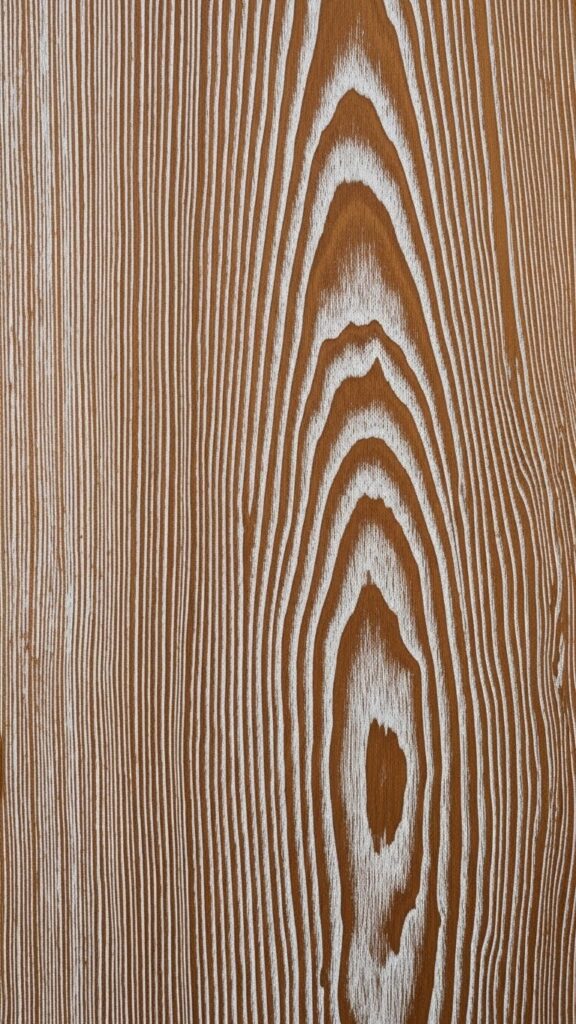
The primary pain points are the strong, prominent grain and its inherent warm undertones. When poorly finished, red oak can look orange or pink. The key is to work with the grain, not against it, using modern techniques that were unavailable decades ago. This guide will solve that.
Read Also: 12 Creative Kitchen Lighting Ideas to Transform Your Space
My “Grain-Finish-Hardware” Triangle Framework
Through years of specification work, I developed a simple three-point framework to guarantee success. Every perfect red oak kitchen balances these three elements:
- Grain Emphasis: Decide if you want to Highlight, Subdue, or Contrast the grain.
- Finish Chemistry: Choose a Penetrating, Surface-Build, or Hybrid finish based on look and wear.
- Hardware Anchor: Select Hardware Color & Scale that complements, not competes.
Make these three decisions in order, and the entire design falls into place. I’ve turned this into a free downloadable “Red Oak Cabinet Specification Worksheet” you can use with your designer or contractor. It includes checkboxes for each corner of the triangle and a material sample checklist.
Step-by-Step Implementation: Your 16 Cabinet Design Pathways
Here is your actionable guide, categorized using the framework above. I’m including specific product references and 2024 price ranges (for cabinet boxes and doors only, installation extra).
Designs That HIGHLIGHT the Grain (Natural & Stained)
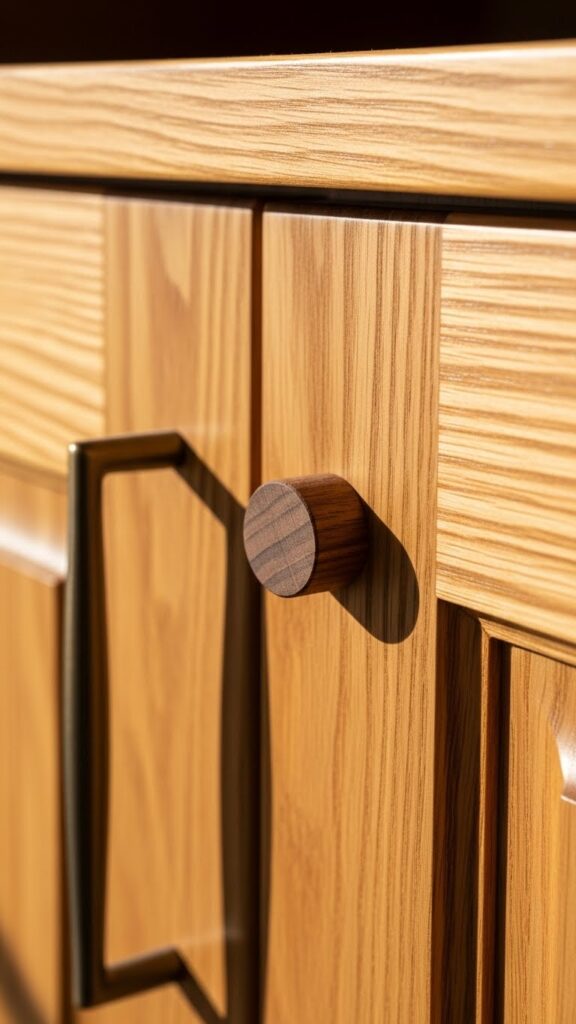
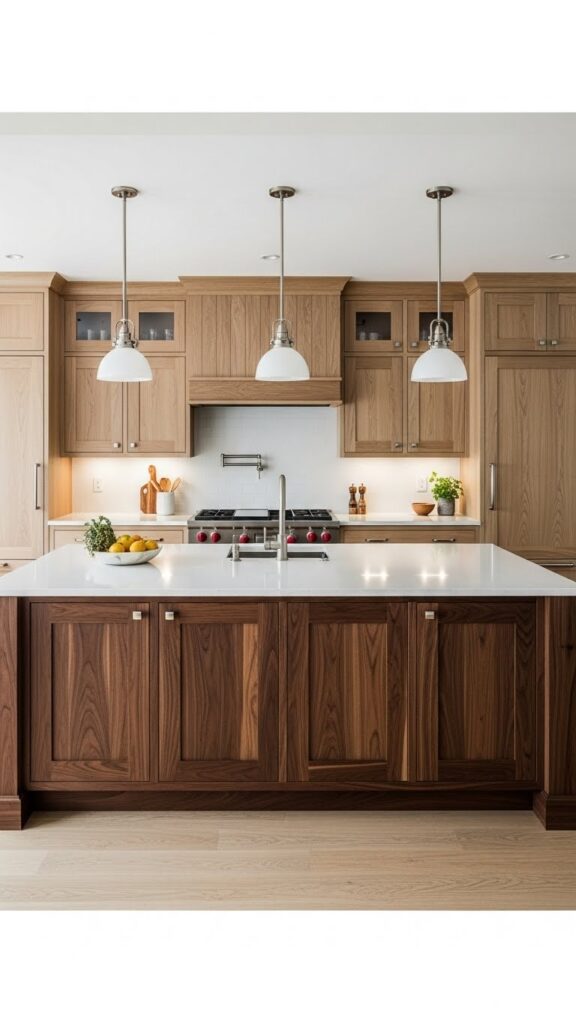
1. Clear-Coated Natural Red Oak
- Process: Sand to 180-grit, apply 3 coats of water-based polyurethane (e.g., General Finishes High Performance Top Coat, ~$50/qt).
- Look: Light, honey-toned, grain is the star. Pairs perfectly with bronze hardware.
- Cost: $$-$$$ (Requires flawless wood selection).
- My Pro Tip: Use a “walnut plug” for the screw holes in the hinges for a seamless, high-end detail.
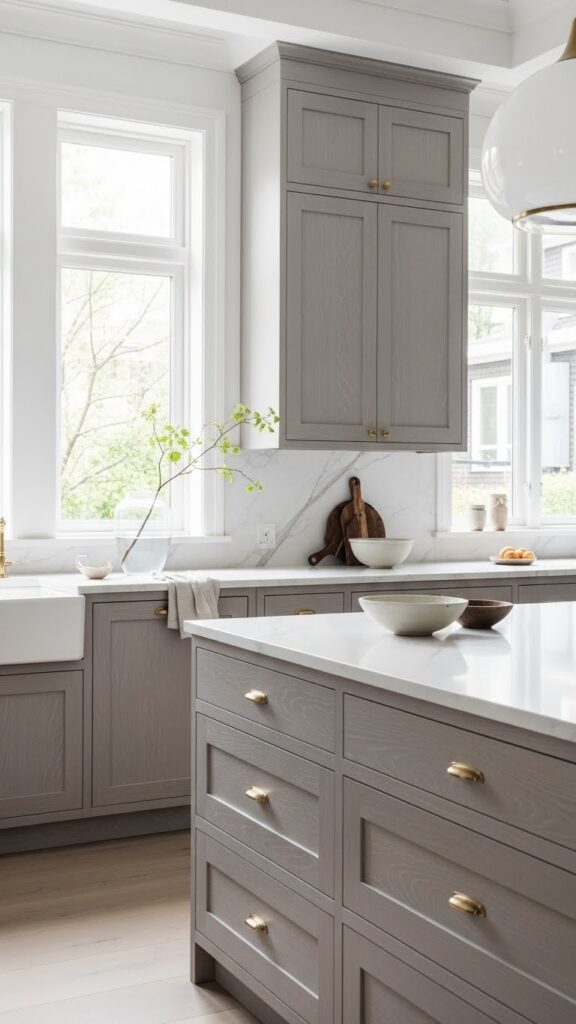
2. Light Gray Wash
- Process: Apply a diluted gray stain (like Minwax Classic Gray), then wipe aggressively, leaving pigment in the grain pores only. Top with matte clear coat.
- Look: Modern, Scandinavian. The grain pops in a subtle, tonal way.
- Cost: $$.
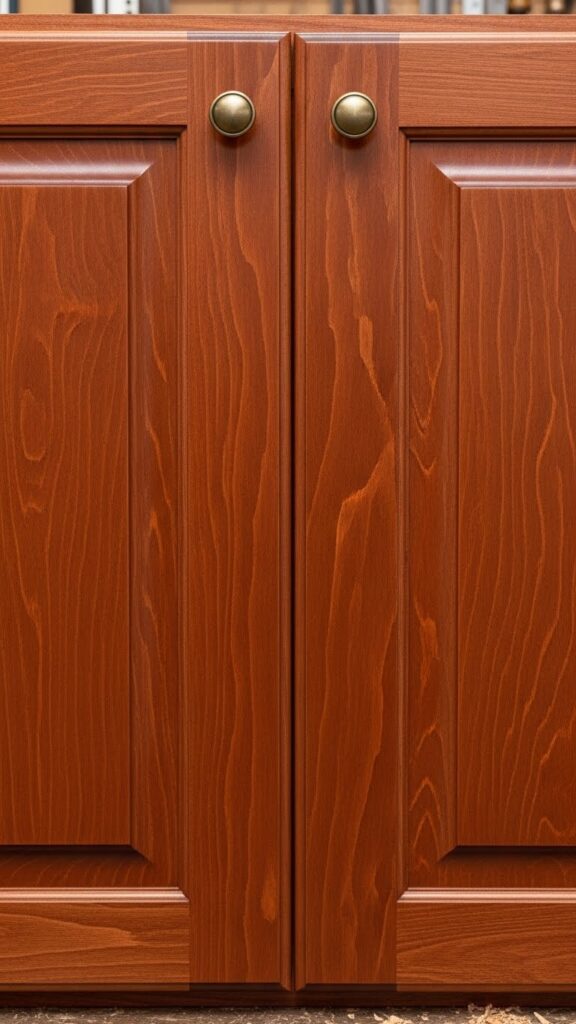
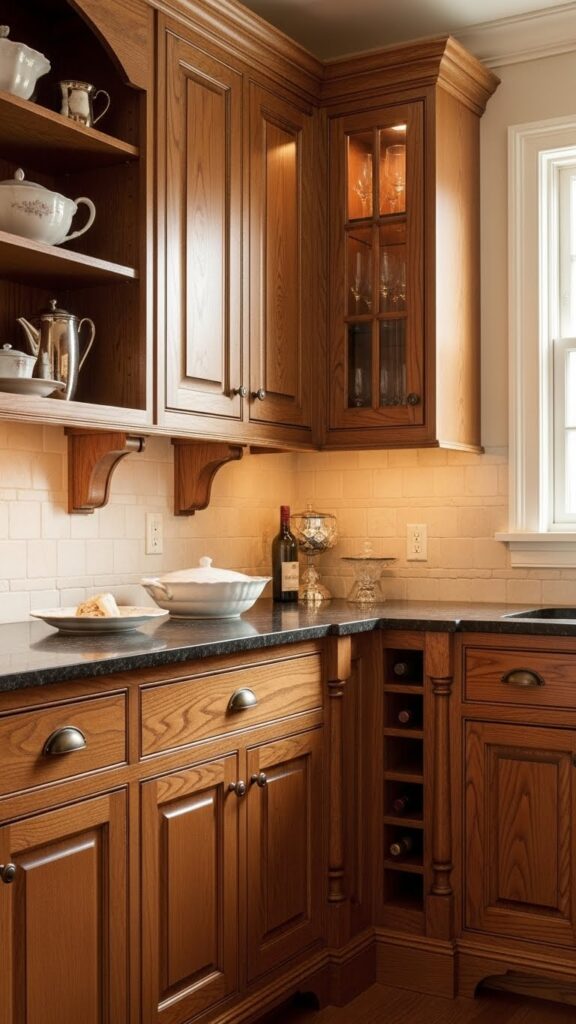
3. Medium Brown Traditional Stain
- Process: Use a gel stain (like General Finishes Gel Stain in Java) to control blotchiness. Follow with an oil-based poly for warmth.
- Look: Rich, classic, and formal. Ideal for traditional Shaker or raised-panel doors.
- Budget Alternative: For a similar look on a budget, consider ready-to-assemble (RTA) cabinets from a supplier like Barker Door in their “Cinnamon” stain on red oak (~$4,500 for a 10×10 kitchen).
Read Also: 15 Blue and Gold Kitchen Ideas
4. Two-Tone Highlight
- Process: Use a dark stain (e.g., Minwax Dark Walnut) on the island and a natural finish on perimeter cabinets.
- Look: Dynamic and focused. The different finishes make the grain patterns play off each other.
Quick Tip: Always, always test your stain and finish on a sample board from the exact same batch of wood your cabinets will be made from. Color variation between lots can be dramatic.
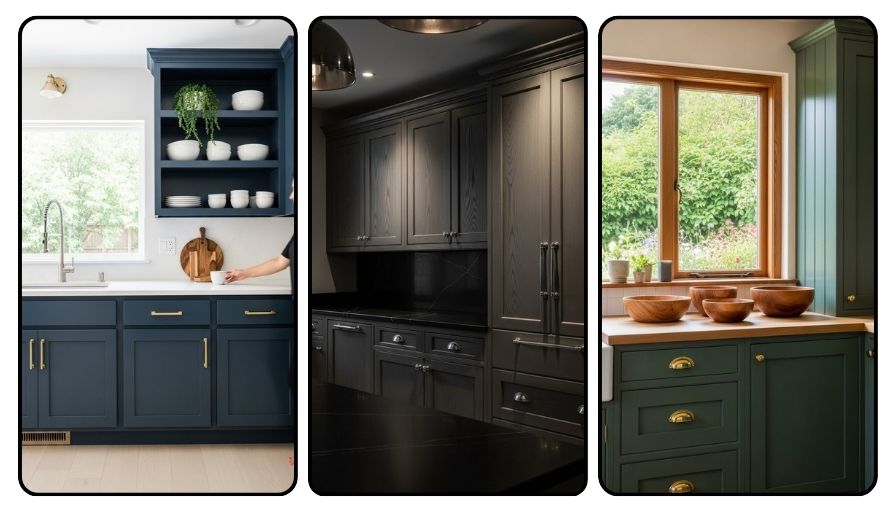
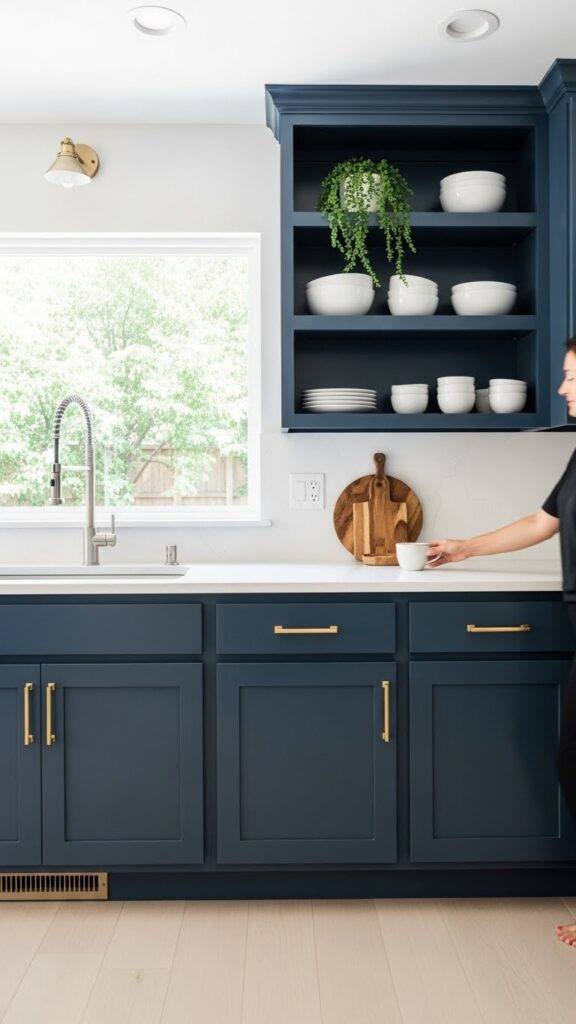
Designs That SUBDUE the Grain (Painted & Tinted)
5. Classic White Painted Oak
- Process: This is CRITICAL. Use a stain-blocking primer (Zinsser B-I-N Shellac Primer, ~$25/gal) to seal the grain, then 2 coats of a durable paint (e.g., Benjamin Moore Advance, ~$60/gal).
- Look: Crisp and bright. The grain texture shows through slightly for character without the color.
- Cost: $$$ (Labor-intensive due to priming needs).

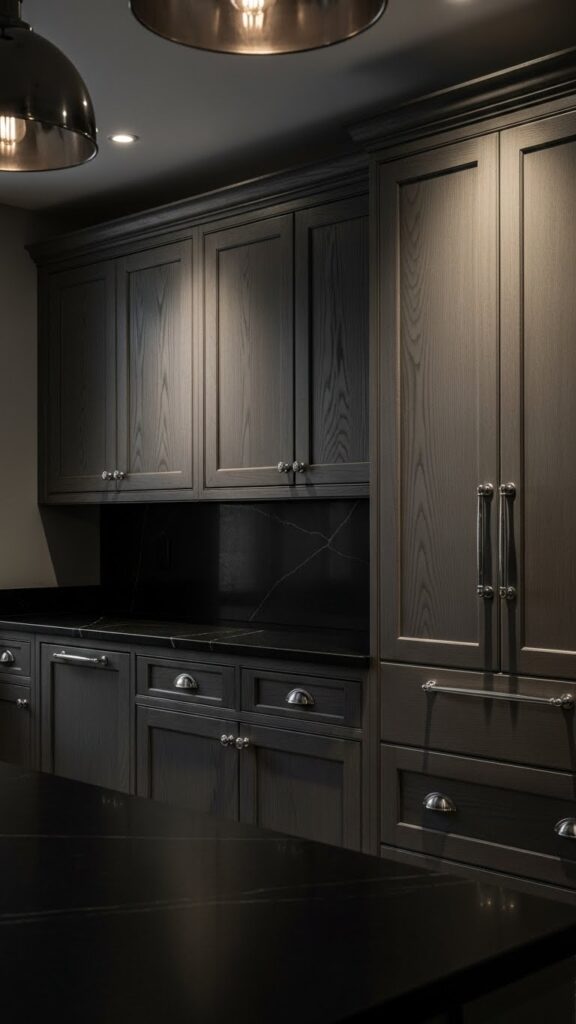
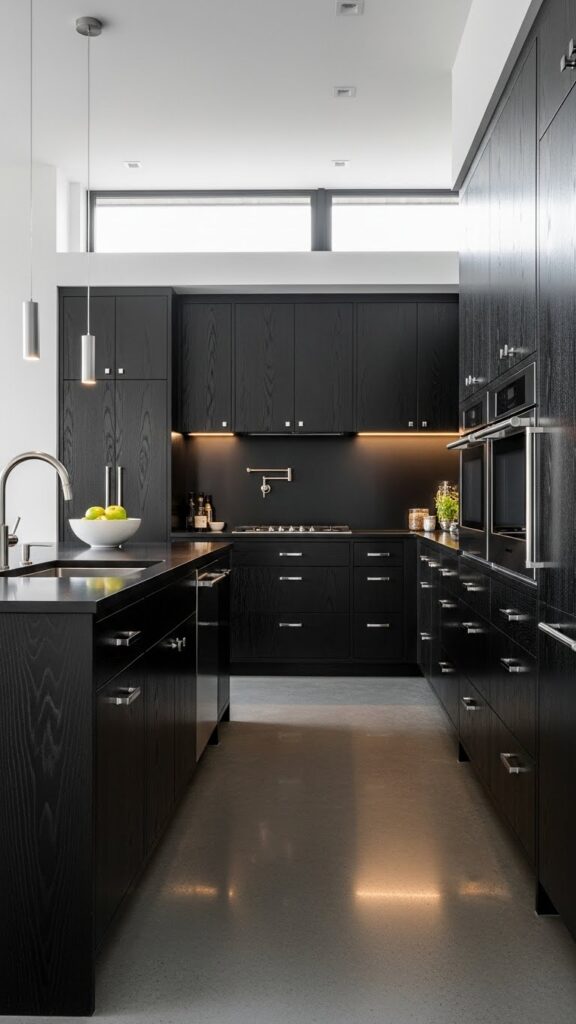
6. Charcoal Gray Painted
- Process: Same priming step. Use a deep, moody color like Sherwin-Williams Iron Ore.
- Look: Ultra-modern and sophisticated. The visible wood texture keeps it from looking flat.
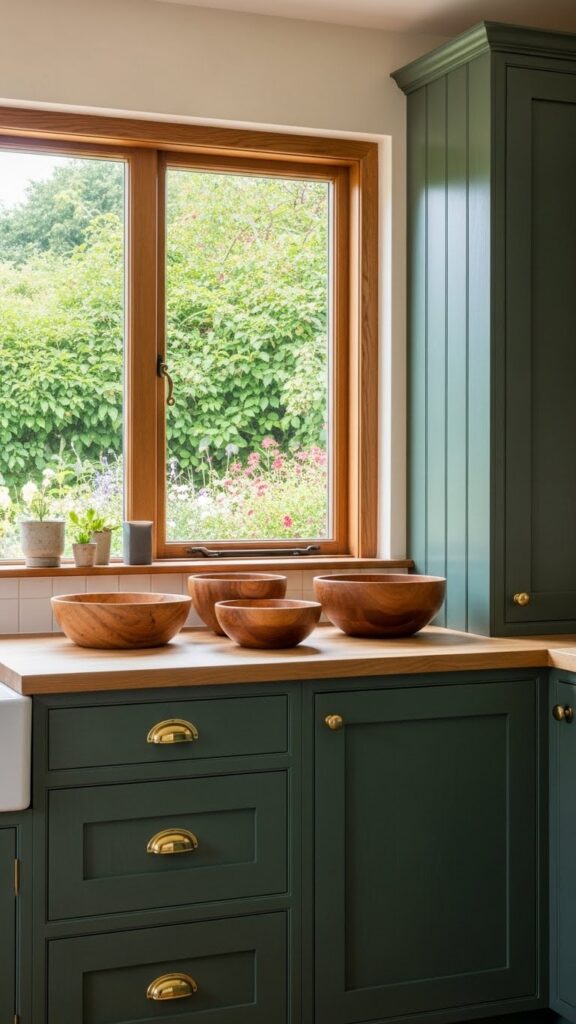
7. Black Forest Green
- Process: Prime, then use a rich green like Benjamin Moore Hunter Green. Finish with a matte clear coat for protection.
- Look: Nature-inspired and incredibly current. The red oak undertone subtly warms the green.
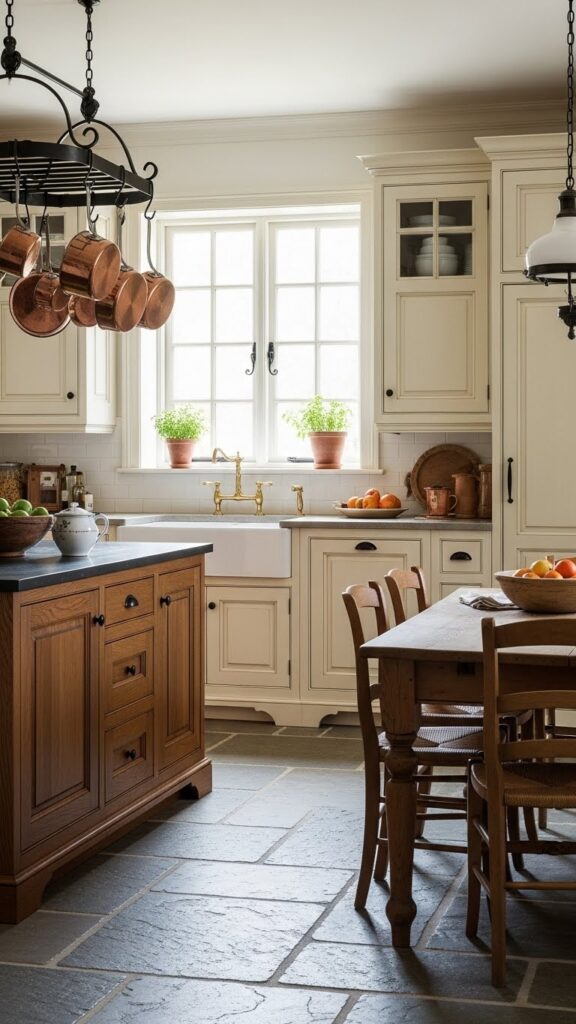
8. Creamy Off-White Glaze
- Process: Paint base color, let dry. Apply a dark glaze (e.g., Van Dyke Brown) and wipe off, leaving it in the crevices and grain.
- Look: Vintage, European country charm. The glaze emphasizes the door profile.
Designs That CONTRAST the Grain (Modern & Bold)
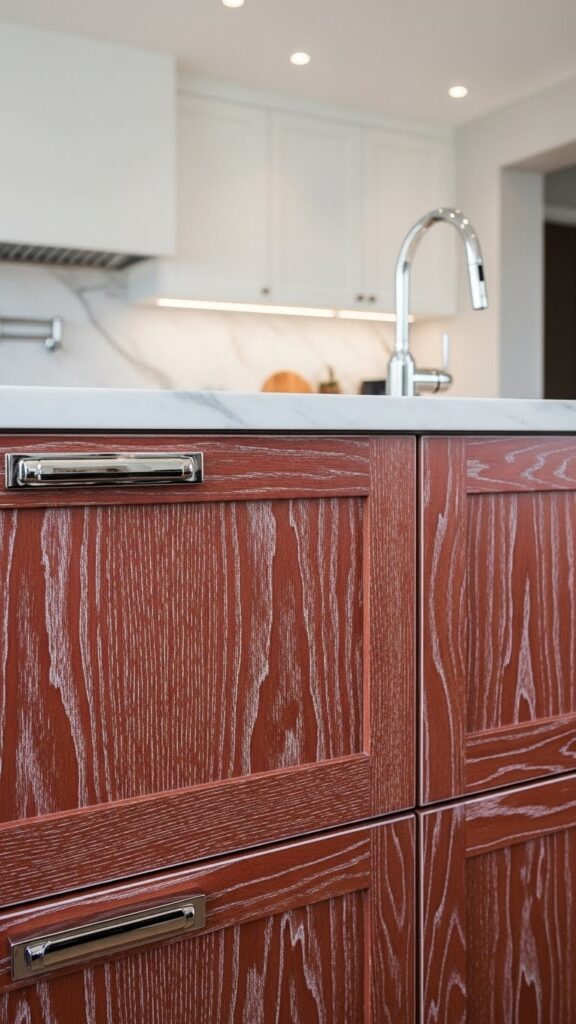
9. High-Contrast Liming Wax
- Process: Brush a white liming wax (Briwax Liming Wax, ~$20) into the open grain. Wipe off excess. The white sits in the pores against the brown wood.
- Look: Striking, graphic, and perfect for cottage or modern farmhouse styles.
- My Experience: In a recent project, this technique on flat-slab doors created a stunning focal wall that guests constantly compliment.
10. Cerused Oak (The “Designer Secret”)
- Process: Similar to liming but more durable. Use a white pigmented paste wood filler rubbed into the grain, sand the surface clean, then topcoat.
- Look: Ultra-luxurious, textured, and high-end. Commonly seen in designer magazines.
- Cost: $$$$ (Specialist labor required).
11. Ebony Stain with Visible Grain
- Process: Use a penetrating ebony stain (like General Finishes Ebony). The deep black stain will leave the raised grain slightly lighter, creating a silvery, textured effect.
- Look: Dramatic and modern. Pair with polished nickel hardware.
12. White Stain Wash
- Process: Dilute a white pigmented stain 50/50 with water. Apply and wipe, leaving a translucent white film that lets the brown grain show through underneath.
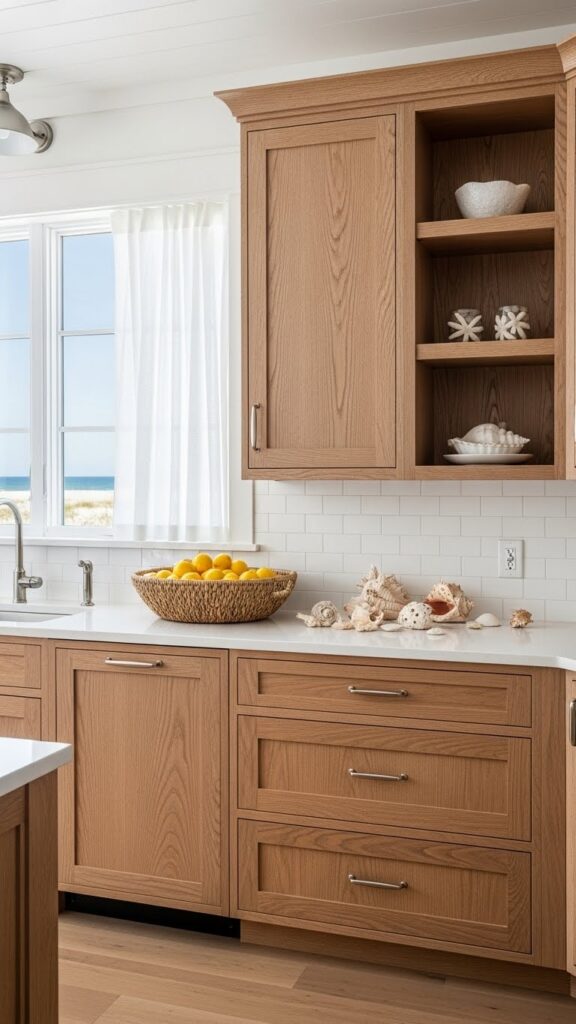
- Look: Beachy, airy, and relaxed.
Door Style & Layout Pairings
13. Slab (Flat-Panel) Doors with Minimal Hardware
- Implementation: Use a natural or light stain. Specify touch-latch or edge-pull hardware (like Richelieu’s flush pulls). This lets the uninterrupted grain flow be the art.
- Ideal For: Modern, minimalist, and mid-century modern kitchens.
14. Shaker Doors with Bold Color
- Implementation: Paint your Shaker doors a bold color (navy, green). The simple profile grounds the color, and the wood’s stability prevents joint issues.
- Product Suggestion: Conestoga Cabinets offers a durable painted finish on red oak Shaker doors.
15. Inset Doors for a Furniture Look
- Implementation: Inset doors (where the door sits flush with the frame) in a medium brown stain showcase premium craftsmanship. Red oak’s stability makes it an excellent choice for this precise style.
- Cost: $$$$ (Most expensive construction method).
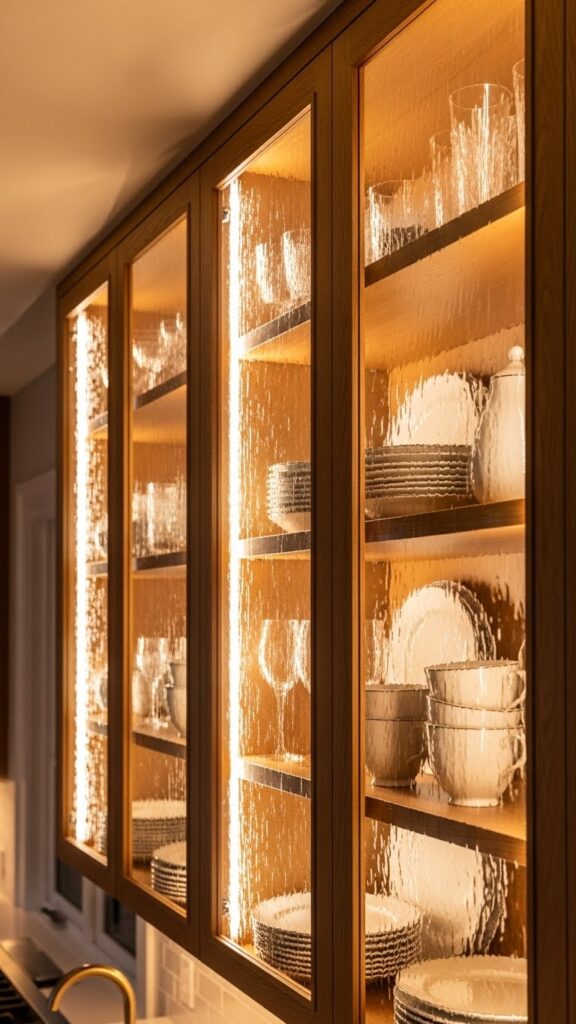
16. Glass-Front Uppers with Lit Interiors
- Implementation: Use red oak for the cabinet frames and shelves, but pair with clear or seeded glass doors. Install LED tape lighting inside (like Philips Hue Lightstrip, ~$80/6.5ft).
- Result: This breaks up the wood visually, displays your dishes, and adds ambient light. The warm oak makes the lit interior feel cozy, not clinical.
Pro Tips, Shortcuts & Little-Known Facts
- Flitch-Match Your Doors: A pro secret. Request that adjacent cabinet doors are cut sequentially from the same board (“flitch-matched”). This makes the grain pattern flow continuously across your kitchen, like a piece of art. It adds 10-15% to the cost but is a huge wow factor.
- Finish the Interiors: Spending a little extra to have the cabinet interiors sanded and sealed with a clear coat (not just stained) makes cleaning spills a breeze and feels luxurious.
- The “Fuming” Alternative: An unexpected, chemical-free way to darken oak is ammonia fuming. It reacts with the tannins, creating a rich, gray-brown patina that penetrates deeply. It’s a specialist technique but yields a unique, non-blotchy color.
- Red Oak is Harder Than White Oak: On the Janka hardness scale, Red Oak scores 1290, while White Oak is 1360. It’s a myth that red oak is “soft”; it’s an incredibly durable choice for cabinetry.
Common Mistakes to Avoid (And How to Fix Them)
Mistake 1: Skipping the Pre-Stain Conditioner on Stains.
- Solution: Red oak is porous and can blotch with traditional stains. Always use a pre-stain wood conditioner (like Minwax’s) to seal the grain evenly. Apply, wait 5-15 minutes, wipe off excess, then stain.
Mistake 2: Using the Wrong Green Undertone Paint.
- Solution: The natural pink/red undertone of the wood can clash with certain paint colors. If painting, stick to colors with a brown, gray, or creamy base. Avoid clear, bright greens or blues unless you want that contrasting vibe.
Mistake 3: Ignoring the Wood’s Movement.
- Solution: Wood expands and contracts with humidity. Ensure your cabinet maker uses frame-and-panel construction for wider pieces to allow for this movement. A solid wood slab door over 24″ wide can warp.
Budget-Friendly Alternatives
You can achieve the red oak look at almost any budget.
- Luxury ($25k+): Custom, flitch-matched, inset doors with a specialist finish like cerusing.
- Mid-Range ($12k – $25k): Semi-custom cabinets from brands like Canyon Creek or Wellborn in a red oak door style with your chosen factory finish.
- Budget ($4k – $12k): Ready-to-Assemble (RTA) red oak cabinets online from companies like Barker Door or Cabinet Joint. You assemble and finish yourself. A 10×10 kitchen can cost as little as $3,500 unfinished.
- DIY Refresh ($500 – $2k): Refinish your existing red oak cabinets. This involves degreasing, sanding, and applying a new finish. My go-to kit is a Deglosser (instead of heavy sanding), Zinsser primer, and a HVLP sprayer for paint.
Safety & Expert Considerations
- Finishing Safety: If refinishing yourself, safety is paramount. Work in a well-ventilated area, wear a NIOSH-approved respirator for vapors (not a dust mask), and use chemical-resistant gloves. Store rags used with oil-based stains in a sealed metal container—they can spontaneously combust.
- Child & Pet Safety: Specify soft-close hinges and drawer slides on all cabinets. This prevents slammed fingers and is a non-negotiable in modern kitchens. Brands like Blum are industry standard.
- Professional Credentials: As someone who has specified hundreds of kitchens, I insist on this: Always verify your cabinet installer is insured and licensed. Ask for proof. A proper installation affects longevity more than the wood itself.
Conclusion
Red oak kitchen cabinets offer unparalleled versatility, warmth, and strength. By using the Grain-Finish-Hardware Triangle Framework, you can confidently navigate from classic to contemporary looks. The key is to embrace the wood’s character and use modern finishes to achieve your desired style.
Your Next Steps: Start by collecting physical samples of red oak with different finishes. Download my free Red Oak Cabinet Specification Worksheet to organize your thoughts. Then, approach a designer or cabinet maker with your completed framework in hand. This preparedness will save you time, money, and ensure you get a kitchen you’ll love for years.
FAQ Section
Q1: Are red oak cabinets out of style?
A: Absolutely not. The dated look was due to specific 90s finishes (orange polyurethane, heavy gloss). With modern matte finishes, paints, and techniques like cerusing, red oak is highly fashionable and valued for its grain and durability.
Q2: What is the most durable finish for red oak kitchen cabinets?
A: For stained cabinets, a catalyzed varnish (a commercial-grade finish) is the most durable, resisting heat, chemicals, and moisture. For painted, a properly applied 2-part catalyzed paint (like Benjamin Moore Command) is incredibly tough. For DIY, a water-based polyurethane over a stain is very good.
Q3: How do I keep my natural red oak cabinets from turning yellow/orange over time?
A: The culprit is often the topcoat. Oil-based polyurethanes and sealants amber over time. To maintain a lighter, truer color, use a water-based polyurethane with UV inhibitors. Apply 3-4 thin coats for protection.
Q4: What hardware color looks best with red oak?
A: It depends on your finish.
- Natural/Light Stains: Satin brass, oil-rubbed bronze, black matte.
- Medium/Dark Stains: Polished nickel, chrome, iron black.
- Painted Cabinets: Almost anything—this is where you can have fun with brass, copper, or porcelain.
Q5: Is red oak or white oak better for cabinets?
A: Both are excellent. Red oak has a more pronounced, porous grain and warmer tone. White oak has a tighter grain, more figured patterns (like ray flecks), and a cooler, grayish tone. White oak is slightly harder and more rot-resistant, but red oak is typically 15-25% less expensive.
Q6: Can you paint red oak cabinets without seeing the grain?
A: You will always see some grain texture, which is desirable for character. To minimize it, you must use a high-build grain filler before priming. This is a labor-intensive process but creates an almost perfectly smooth surface.
Q7: What’s a realistic budget for a 10×10 kitchen with semi-custom red oak cabinets?
A: As of 2024, for semi-custom red oak cabinets with a standard finish from a reputable supplier, expect to pay between $12,000 and $18,000 for the cabinets themselves. Installation, countertops, backsplash, and appliances are additional.

Pingback: 12 Gorgeous Vintage Yellow Kitchen Styles